Baking with children

The return of the Great British Bake Off has got us all in a bit of a bakey mood and what better activity to fill those occasional wet summer days than a spot of baking?

Baking is great for children. It incorporates key skills such as literacy (reading a recipe and identifying ingredients) and numeracy (weighing and measuring quantities, or doubling a recipe if you’re feeling greedy), and introduces children to scientific concepts (mixing, melting, solidifying and why does it do that?), healthy eating (yes, really), and food hygiene. All that mixing and pouring, spooning and decorate works those motor skills to, so it’s not just about having a tasty cake for your afternoon snack, although that is obviously very important.

You can start baking with children from a very young age, as soon as they can hold a wooden spoon they can get involved in the process albeit mostly by banging on a saucepan but they’re seeing, and smelling, and learning, and it gives you a lot to talk about. Obviously it gets a lot more interesting, and messier, when they can start stirring for themselves, and even more interesting, and messy, when they can start weighing, pouring and spooning. But then they learn the important life skill of Clearing Up After Themselves.

If you’re a baking novice, never fear! You can learn along side the children, so here are some Really Easy Fairycakes to get you started and then you can graduate to Mary Berry GBBO standards. Happy baking!


Frances Norris is a former nanny and mother of two, whose children aged 3 and 8 months are in training for GBBO 2028.

Kubb (Viking Chess)

I want to tell you all about a great game I discovered this summer. It’s great fun for adults and kids, very simple to play and you can play it almost anywhere there’s a patch of grass. My charges love the grisly origins of the game and it’s inspired us to learn about the Vikings.


The idea is simple. You throw sticks of wood at your opponents’ blocks of wood and try to knock them down so you can knock down the big block of wood – the king – in the middle. Originally the sticks of wood were leg bones and the blocks of wood were skulls, but don’t let that put you off! Each team starts with a line of 5 ‘skulls’ and 6 ‘bones’ and you have to throw your bones at your opponents skulls and try to knock them over. If you knock over a skull then next turn your opponents throw the skulls into your half and then have to knock all those skulls down before they can hit any skulls left on your line. Occasionally you knock over a skull on the line before you’ve knocked down the ones you’re supposed to have first but that’s okay because you have one more throw to get the remaining skull(s). If you don’t knock down all the skulls in the middle then on your opponents’ next go they can throw from any of the skulls left standing, which means they can be a lot closer to your line. When all the skulls on the line have been knocked down you can throw your bones at the king in the middle, which is bigger and heavier than the normal skulls, and try to knock it over. First to get all their opponents’ skulls and the king wins, but if you knock over the king before you’ve got all the other skulls you lose! There are a couple of other rules but that’s the basic idea, and games last between 15 minutes and an hour, depending on how good you are at aiming!


It’s a great game for improving throwing skills and you can adapt the size of the pitch to suit smaller players because it’s just marked out by pegs. Adults and older children can play on a full size pitch which is about 5 paces by 10 paces, but the exact size isn’t important. We’re playing with a 3 year old in tow so our pitch is about half the size. You only need 2 players but teams can be up to 6 on each side and we always attract a couple of children we’ve never met before each time we play it at the park.


The only downside to the game is that the wooden pieces are quite heavy to carry about, but don’t let that stop you trying this great game.

Treasure hunts

The weather is starting to look quite fine so it’s time to get outdoors! Treasure hunts are a brilliant activity for all ages. that can easily be adapted to the interests and abilities of each child. You can theme your hunt around nature or a colour, or include an element of imaginative play such as pirates searching for treasure, survivors stranded on an island who need to recover all the missing pieces of their vessel before they can leave or rescuers on the trail of a kidnapped teddy. Treasure hunts are also a very low cost activity – you just need paper and some ‘treasure’!


For tinies

Even toddlers can participate in a treasure hunt by following picture clues. They’ll obviously need careful supervision but you’ll be amazed how soon they get the hang of it. If you’re doing this alongside older children it’s probably best to have a 1 easy:3 harder clues ratio to prevent older children from racing through their clues too quickly.

For early readers

As soon as they can recognise letters you can start to incoporate them into clues. If the clue is ‘b’ then the next clue might be found near an object that begins with ‘b’. You can quickly progress onto simple words and it will give their confidence a boost too.

For confident readers

Confident readers can have more complicated words or whole phrases as clues, including simple rhymes and easy puzzles.

For older kids

Older children who may find words or phrases simplistic can be engaged by using word puzzles and riddles. Try creating anagrams of the next clue’s location, mirror writing or a secret code that they have to break.

You need a few moments in private to place your clues, so get your bosses in on the secret so you can hide them in the garden before work, or team up with another nanny and go to a park or some woodland – one nanny can look after the children while the other runs around to plant clues. Just make sure you have your employers’ permission before leaving your charges with someone else.

Treasure hunts can be a great competition with a race to find the clue or a way to encourage teamwork and get older ones to help by reading the clue but encouraging younger ones to answer the riddle. They encourage all-important problem solving skills and independence so don’t leap to give them the answer when they’re struggling and let them go off after clues by themselves.

Ready…..set…..seek!

5 ways with pom-poms


Pom-poms are a great tool for promoting all kinds of development. Here are 5 activities you can do with a muffin tray, a small jar or cup, a pair of tweezers or tongs and a load of pom-poms.


Pick them up and drop them. This simple activity for younger children promotes the pincer grip, which is vital for holding a pencil later on. Picking up and dropping the pom-poms promotes hand eye coordination and provides a sensory experience too.

Sort the pom-poms acording to colour. Not only is this promoting fine motor development and hand-eye coordination but it’s also working on matching and colour recognition.


Extend the activity by using tweezers. If you put the pom-poms into a narrow necked jar they won’t be able to get their hand in their to pick the pom-poms up so they’ll need to use tongs or tweezers. The pinching motions strengthens the muscles in the hand and the added challenge will develop problem solving abilities.


Count. It sounds simple but you have a lot of pom-poms so you can at least count to twenty with all of them, count how many of different colours, work on concepts such as more and fewer, and add up by transferring pom-poms from one part of the tray to another. It’s ideal for explaining tens and units if you have different sized pom-poms. The smaller ones are units and when you put the tenth smaller one in you can exchange 10 small pom-poms for a bigger one. Top tip from a primary maths specialist – always start to count from zero. The quantity ‘one’ doesn’t make sense unless there is nothing there in the first place so make it obvious and associate zero with nothing from the start.


Blow them. Pom-poms are light and they roll so get down and blow them in a straight line or round a course you’ve drawn out on paper. As well as encouraging children to fill their lungs this also develops the muscles of the face and jaw which is great for speech development.

The Pufflympics

Stuck for ideas? Why not try a themed activity week?! Nanny Claire has done weeks of activities centered around Princesses,  cars and space, and here she shares her Winter Olympic theme with a twist.


I’m a nanny and look after 3 children, two girls E 12 years old and AM 6 years old and one boy AC 9 years old. My job is usually part-time, I do the school run and then ferrying around various after school activities and playdates. However, there are times that those who look after children dread…the school holidays.

I had not given much thought as to what we were going to do all week, swimming, movies and playdates were confirmed but they don’t take up the whole week. On Monday the kids were having breakfast and it just so happened that the Winter Olympics were on, so especially with sports obsessed AC, we  were watching the curling. I’m usually quite strict on TV hours, switched off after breakfast until at least 4:30pm, but the Winter Olympics is not on every  week so it’s an exception to the rule.

As most of us who look after children know, it’s not long before we get the inevitable phrase “What are we going to do today?”, one of the kids said that curling looking fun so I said I bet we can find something to do curling with if you get washed and dressed, at which point they vanished like speedy ninjas.

So now I had to find something to play curling with, I wandered around looking at the various toys and then I saw the puffles…If anyone doesn’t know what a puffle is, they are pets for penguins on the popular Club Penguin game, they are basically small round, come in various colours and have fuzzy hair. There happen to be quite a few in the kids collection, kind of curling stone shaped and should slide across the floor quite nicely!

The weather outside was typically pouring down with rain, so I tested some chalk on the kitchen tiles just to make sure it would come off  later (not my floor after all!), no problem there so I sketched out some circles to represent the house in curling, got the brush out of the cupboard  and we were ready to go! There was soon puffles flying in all directions and much laughing, arguing and cheering. We decided that scoring would be whoever got their puffles closest to the middle on their turn, I didn’t expect the game to be such a big hit and the kids asked what other events we could do.

So we looked up the other Olympic sports there were, and I tried to work out how we could replicate them at home, a brief thought of kids  sliding down the stairs on trays entered my mind swiftly followed by thoughts of a trip to A & E. However bob sleigh could work, if we made them for the  puffles and not the kids. So at dinner I told the kids we were going to be making bob sleds for the puffles tomorrow.

On Tuesday morning I was greeted with much excitement, “Are we still making sleds for puffles today? After breakfast I raided my box collection, always have a variety of empty boxes for such rainy days, I cut down 3 boxes to the same size for each of them, out came the glue, and various arts and crafts paraphernalia. There was much discussion about what would make it slide better, runners on the bottom, aerodynamics, making it look pretty, etc.


I fashioned a slide out of some cardboard box strips and white bin liners, and put it on the stairs, we then timed each puffle and recorded the time. The kids spontaneously decided to create a team name and made-up country for their puffles, so we then had team Fermat for E, team Mouseling for AM and team I Don’t Know for AC, they created maps for their countries and an event chart went up on the wall, all their own ideas I’m proud to say.


The pressure was now on me to come up with the next day’s event, thinking of the events involved I decided that the Ski slalom was possible with a little help from a remote control car! This did involve tying the puffle to the car under the pretence of a seat belt, and the kids made crash helmets out of craft foam for them! The kids have a building set called Cranium which is a set of poles and cloths which can be constructed to create play houses, etc. and the poles turned out to be quite useful for slalom flags. We opted for the rule of having to go around 2 poles at least and not all of them, this way they all had a good chance to get around the course successfully. They had plenty of time to practice driving the car before we did individual times and recorded them on the event sheet, needless to say puffles and poles went flying in all directions!

I went home that night and dreamt of puffles, and how to do the next event! I decided that I could recycle the bob sled run into a ski jump  and use the remote control car again; we used a sun lounger cushion so we didn’t mangle the car. I admit the car was very slow but managed to construct  the jump so if you lined up well you could get the car to do a small jump off the end, sufficient enough to get a small measurement anyway. The kids all got  to practice again before we took some final measurements. This wrapped up the final event of the Pufflympics, the next day was Friday and the last day of the holidays.

We decided to host our own closing ceremony; a toy shopping trolley became a puffle parade float with a few adaptions of course. The kids designed their own part of the float to put their puffle on to reflect their team and country. Next was designing their own podium step, E helped me make some medals by gluing some sequins to stickers and then cutting them out. E made a party playlist on her iPod and wrote a speech, AC lined the parade route on the floor with string and AM helped me get some food ready. It was junk food heaven as I let them have full reign on what food they wanted, so we had hot dogs, pizza, chips, cheese sandwiches and squishy tomatoes (AM really really likes cherry tomatoes roasted until extremely squishy)!

So after a busy week hosting the Pufflympics the kids had been entertained all week when it was generally too rainy to go outside, and I hadn’t been driven mad by kids asking what they can do every 10 minutes. Most importantly we all learned a lot more about the winter Olympic sports, lots of fancy new words and rules and at a fraction of a cost compared to the real thing. I essentially used toys and things we had in the house, the kids had a blast and spontaneously  added lots of their own ideas of what they could do. If you fancy hosting your own event you don’t necessarily have to have puffles on hand, cars would also have made great competitors for the Carlympics or a variety of cuddly toys for the Cuddlympics? You don’t need to be confined indoors or to the Olympics either. Why not host the World Cup or the Commonwealth Games outside?

Pancake races

Tomorrow is pancake day. Up and down the country people will be holding pancake races. To find out more about the origins of pancake day including how to make pancakes check out last Friday’s post. But what is a pancake race?

A pancake race is a running race where the runners have to carry a frying pan and flip a pancake while running. The most famous race is in Olney in Buckinghamshire but there are races all over the country.

So where did it come from? The story is that in the 1400s a woman was busy cooking pancakes on Shrove Tuesday when she heard the church bells ring to say it was time for church. She ran from her house to the church with her frying pan and pancake.

Today even politicians get involved with the annual Parliamentary Pancake Race in aid of the charity Rehab. Why not give it a go yourself?

Smart socialising for nannies

One of the biggest concerns for nannies and parents alike is that nannying can be isolating for both nanny and child. Social contact is important for all human beings and as well as giving children the opportunity to play with others, going to groups and setting up playdates also gives nannies the opportunity to model social skills and how to form healthy relationships. But if you’re new to having a nanny or new to an area, how do you get started?


Have clear expectations

Whether you’re a parent or a nanny the interview process is the time to test out the other party’s take on socialising. It’s a question that might throw first-time employers but it can be helpful to remember that nannies don’t have coworkers and benefit from some kind of adult contact during the day so although it might feel like they’re asking to have their friends over to drink your coffee that’s not really the case, they just happen to have a network of ‘colleagues’ that they can take from job to job. There are no hard and fast rules , the most important thing is that both sides are happy with what is agreed.


Nannies don’t just have to see nannies

Sometimes new nannies can get hung up on only soicalising with other nannies and miss out on all the other social possibilities out there. While it can be great to meet up with someone who understands where you’re coming from, parents and childminders at groups with similar aged children can also enrich your social circle and at the end of the day playdates should be for children.


Be pro-active

Although there is a lot to get to grips with when you start a new job, be pro-active about finding social opportunities. Posting on the Nannyjob Meet Other Nannies messageboard or joining our social club for nannies can help you find nannies working near you and the Places to Go section will help you find activities in your area. Searching for groups and


Different social circles or friends in common?

This is probably one of the trickiest social situations to navigate. Are you happy to meet up with your boss’s NCT group and are they comfortable with that? Would you prefer that your nanny only meets up with people you know during work hours? What about playdates for school aged children? What about nannies who only work part-time? Again there are no hard and fast rules but communication is key to finding something that works for both of you!

Playday, play every day

Yesterday was Playday 2013, a national celebration of play devoted to encouraging and promoting play for children. This year it was focused on play spaces and playing out in the great outdoors. How many of you played outside yesterday? Did it depend on the weather – too hot, too cold, too sunny, too rainy? Did it depend on whether you had ‘somewhere to go’ to play? Do you have an outdoor playspace near you?

Children today are often limited to sanitised parks and playgrounds, gardens with lawns and patios, discouraged from grubbing around in the dirt or rolling around on grass, climbing trees or picking flowers. Sometimes nannies (and childminder and parents too!) need to think outside the box a little, and make the most of the flexibility home based care affords.

You can find outdoor play spaces on the Woodland Trust website or via Fields In Trust or get involved in Groundwork’s initiatives in your area.

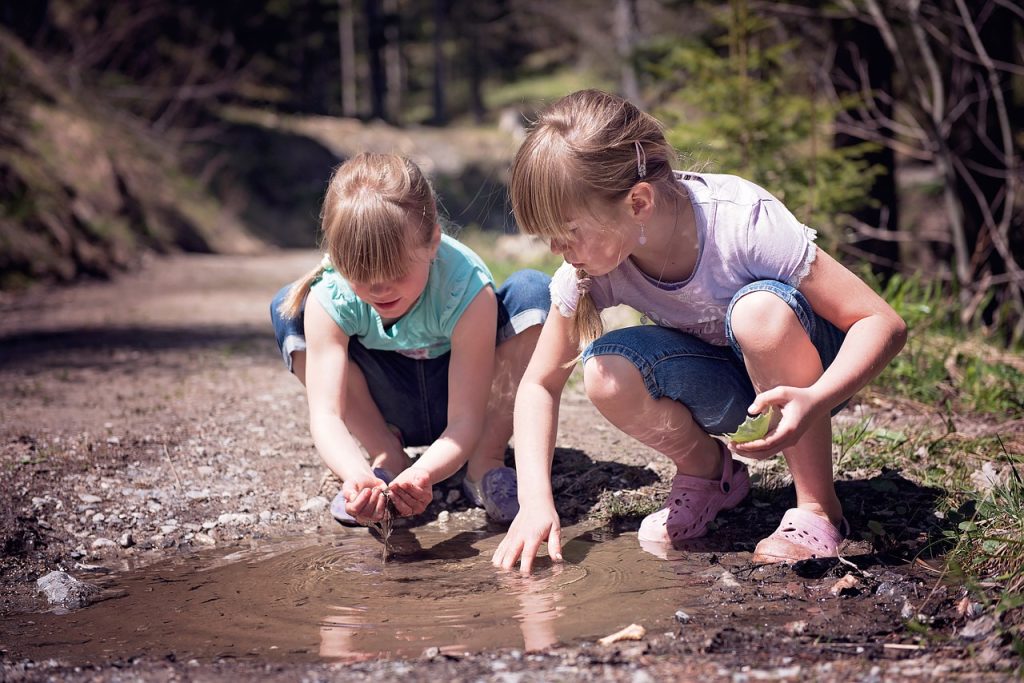
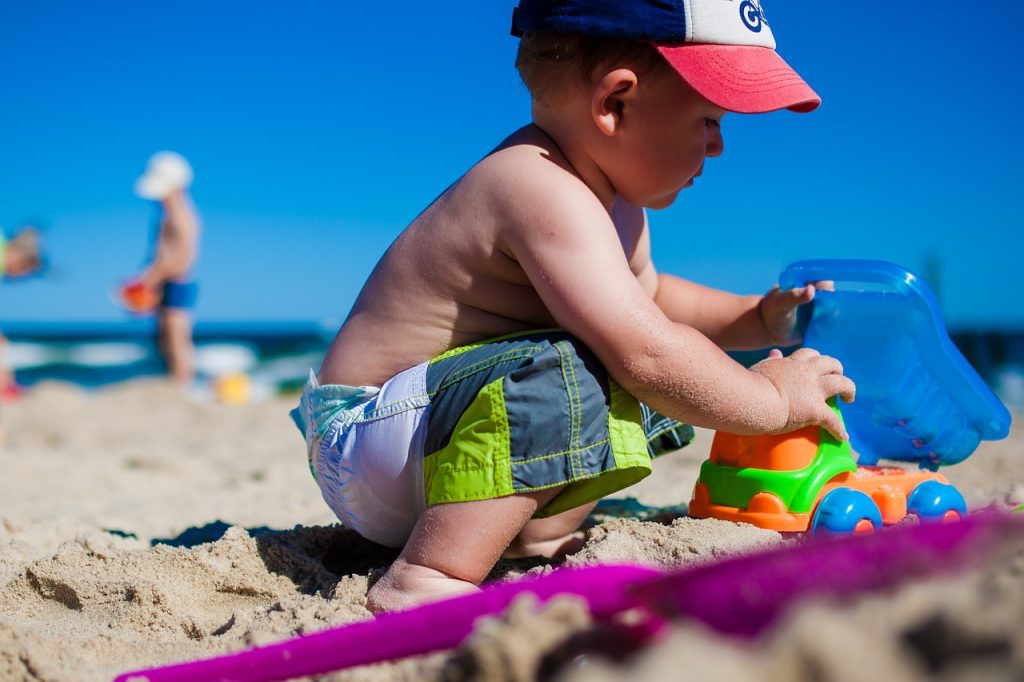
Once you’re there, what can you do? In a field you can run, jump, turn somersaults or cartwheels or have a wheelbarrow race. In a forest you can play hide and seek, climb a tree, make a den. Near a pond, lake or stream you can hunt for pond life, make a mud pie and lean how to skim stones across the water. On a beach you can paddle, fish for shrimps or crabs, make sandcastles. It doesn’t matter if it’s raining – if it’s warm just wear a t-shirt and shorts and take a towel and a change of clothes because everyone should get soaked through having fun at least once in their life!

And if you need some more ideas, the National Trust has 50 things you absolutely need to do and our Pinterest boards have ideas for outdoor fun, sensory play, games and activities and some practical tips and tricks too!

Play today, play every day!

9nifty no bake treats

Sometimes you want to have a yummy treat but you don’t want to use the oven or you’re too impatient to wait for a cake to bake. Maybe you don’t have any eggs, or flour? Don’t worry – we have 9 nifty treats to the rescue!

1. Chocolate cornflake crispies

They’re an oldie but a goodie.

Ingredients: chocolate (as much as you like) and cornflakes or rice crispies (just enough for the chocolate to cover them)

Equipment: Hob, saucepan and heatproof bowl or microwave and microwaveable bowl, large bowl and spoon for mixing, cupcake cases, fridge

Melt some chocolate either in a bowl over  saucepan on the hob or in the microwave, mix it with some cornflakes or rice crispies, spoon it into cupcake cases, pop them in the fridge and wait for them to set (that’s the hard bit!).

2.  No bake cheesecake

And you thought cheesecake was complicated…

Ingredients: Half a pack of digestive biscuits (or hob nobs or ginger nuts), 125g butter , 375g cream cheese, 1 x 400g tin of condensed milk, lemon juice (to taste)

Equipment: A freezer bag, rolling pin,  microwave and microwaveable bowl or hob with saucepan and heatproof bowl, mixing bowl and spoon, round baking tin with removable base (ideally springform), fridge, cling film, scales, tin opener

Take the cream cheese out the fridge to soften. Put the biscuits in the bag and crush them with the rolling pin. Melt the butter and combine it with the biscuit crumbs to make a base. Put that in the baking tin and chill until set (usually around 15mins). Then mix the cream cheese, condensed milk and lemon juice together, spoon it over the base and leave overnight.

3. Fruit ice lollies

Make these on a rainy day so when the sun comes out they’re ready!

Ingredients: Fresh fruit (berries, kiwi, peaches, apricot and mango all work well) fruit juice

Equipment: Ice lolly sticks and moulds, or you can improvise with lolly sticks and little plastic cups, chopping board, knife, freezer

Chop the fruit up and pop it in the moulds, fill to 2/3 with fruit juice, pop them in the freezer and enjoy!

4. Iced biscuits

It doesn’t much simpler (or messier) than this

Ingredients: Biscuits, tubes of ready made icing or  icing sugar, water and food colouring mixed to a smooth paste

Equipment: None if you’re using ready made icing tubes, a bowl, spoon and piping bags or bottles if you’re not

Give children the biscuits, give children the icing. Stand back.

5. Yoghurt dipped fruit

Fun and healthy!

Ingredients: Fruit (strawberries, blueberries, bananas, kiwis, raisins), greek yoghurt

Equipment: Knife, chopping board, bowl, trays suitable for freezing, baking paper, freezer

You can choose whether to leave fruit whole or cut it in half or into slices, depending on the fruit. Cover the trays with baking paper. Once prepared, dip the fruit in the yoghurt, put them on the tray, put the trays in the freezer and leave for an hour or so. The idea is to set the yoghurt but not to freeze the fruit (although you can if you want!)

6. Coconut lemon slice

A classic combination of flavours to try with children

Ingredients: 200g shortbread biscuits, 200g condensed milk, 2 cups coconut, zest of 1 lemon, 30g butter, 2 cups icing sugar, 3tbsp lemon juice

Equipment: Freezer bag, rolling pin, mixing bowl and spoon, deep baking tray, baking ppaer microwave and microwaveable bowl, lemon zester, fridge, scales, tin opener

Crush the biscuits in the freezer bag using the rolling pin, then put them in the mixing bowl with the condensed milk, coconut and lemon zest. Combine these, melt the butter and stir it in. Transfer the mix to the baking tray and press it down firmly. Make the icing by combining the sugar and lemon juice and spread it on top. Chill until set and keep in the fridge.

7. Eton Mess

Quick, easy and infinitely variable

Ingredients: Meringues, whipped cream, fresh fruit (traditionally strawberries, but other berries, pineapple, passionfruit and mango are yummy alternatives)

Equipment: knife, chopping board, small bowls

Prepare the fruit, add the meringues broken into small pieces, gently mix in the whipped cream and serve

8. Mini banoffee pies

Ingredients: Digestive biscuits, Carnation caramel, banana, whipped cream

Equipment: knife, chopping board, tin opener, spoon

Arrange the digestive biscuits on a plate, top with caramel, sliced banana and whipped cream

9. Microwave chocolate cake

Who said no baking meant no cake?

Ingredients: 4tbsp flour, 4tbsp sugar, 1tbsp cocoa, 2tbsp beaten egg (can be left out), 3tbsp milk, 3tbsp sunflower oil (or melted butter, or apparently mashed banana works too),  chocolate chips, optional flavouring – vanilla or cinnamon work well

Equipment: Microwave, microwaveable bowl, tablespoon

Mix ingredients together, microwave. My microwave cooks this to perfection in 1 min 30s but you may need to experiment a little.


9 nifty Easter activities

Welcome to our #9nifty series. We’re starting with 9 Easter activities for kids of all ages…


1. Eggs inside eggs

This was tricky for the 2 year old!

How to : Put little foil wrapped chocolate eggs into a ballon and blow it up, cover with the outside of the balloon with glue then wrap string/wool/embroidery thread around it (leaving enough space to take the balloon pieces out but not so much that the eggs can escape) and glue again. Hang them up to dry and when they’re ready pop the balloon and take the pieces out carefully ! Experiment with blowing the balloon up to different sizes or different types of string.

Focus on : Fine motor skills


2. Chocolate easter nests

How to : Melt chocolate, mix with shredded wheat, shape into nests and allow to cool!

Focus on : Numeracy/science – pouring and measuring, melting and solidifying


Simple yet effective...

3. Silhouette bunnies

How to : trace around the bunny, or make a stencil to paint over and make a fluffy cotton tail to stick on!

Focus on : Understanding the world/The World and Traditions in other countries. Talk about the Easter bunny who bring the eggs. Some other countries have the same tradition although in Sweden, Austria and Germany it’s a hare and in France it’s the bells who bring the chocolate ! What’s the tradition in their family ?


4. Easter egg scavenger hunt

How to : Hide your Easter eggs around the house or the garden and write clues. Read the clues together and find where the eggs have been hidden !

Focus on : Problem solving and memory skills

Upcycled junk mail makes a pretty egg!

5. Collage Easter egg cards

How to : Fold A4 paper/card into half and then half again. With a craft knife cut out a shape of an egg from one qurter, this will be the front of your card. Make a collage onto thenow exposed quarter (you might want to mark it while it’s folded) and wait for it to dry. Refold and admire the colourful egg !

Focus on : Colour recognition and decision making.

6. Hand and footprint bunny

How to : Make handprints and footprints in pink paint and cut them out, leaving a reasonable margin. Take 2 paper plates and cover them in cotton wool. Join them together to create the head and body of the bunny. Stick on some googly eyes, black pipe cleaner or strips of felt for whiskers , a pink heart for a nose, the hand prints for ears and the foot prints for feet.

Focus on : Talking about textures. This is a sensory rich activity with sloppy, sticky paint and fluffy cotton wool.

7. Easter bonnet

How to : Buy a cheap wide brimmed hat, or improvise ! Decorate the hat by painting it or covering it with fabric, cut egg cartons open and paint them to make flowers, attach ribbons and feathers, let your imagination run wild !

Focus on : Understanding the World/ People and communities.Talk about the tradition of Easter bonnets. In the past people put flowers on a hat to celebrate spring and wore new clothes at Easter. In America there were big Easter bonnet parades. In the past, people used to wear hats to church.

Peek-a-chick

8. Peekaboo chicks

How to : Cut a small egg shape out of card and then cut it in half horizontally (or if you’ve made collage cards just use your pre-cut egg shapes). Attach the two halves one side of a clothes peg, one at the top and one at the bottom. Draw a small chick and cut it out. Attach it to the other side of the clothes peg behind the egg top so when you pinch the peg together to the open it you’ll see the chick!

Focus on : Object permanence for babies and Knowledge of the World (eggs hatching)

9. Bunny whiskers mask

How to : Take some pipe cleaners and attach them to a lollipop stick (or two or three taped together for stability). Add a pompom for a nose and create some adorable bunny whiskers

Focus on : Role play – make bunny faces and hop like bunnies !